Etiquetas

miércoles, 16 de septiembre de 2015

Make Arduino Board

Create an Arduino


This practice is to create an Arduino Uno board. We will design the plate based on the size of the original. The first thing we will do is take measures and design an original plate by Proteus. Once the plate with the location of its tracks and track changes designed'll take a copper plate and a CNC file will export our Proteus to manufacture the plate. Once we remacharemos plate track all changes and solder all the components needed to operate the plate.


Arduino Uno

Arduino is a free hardware platform based on a plate with a microcontroller and a development environment designed to facilitate the use of electronics in multidisciplinary projects.


Arduino Uno


The hardware consists of a plate with an Atmel AVR microcontroller and input / output. The most commonly used microcontrollers are the Atmega168, Atmega328, Atmega1280 and Atmega8 for its simplicity and low cost enable the development of multiple designs. On the other side is a software development environment that implements the language Processing / Wiring programming and the boot loader that is executed on the plate. The computer is programmed to control the board electronics.

The free integrated development environment can be downloaded free. Arduino can take information from the environment through their analog and digital inputs. It incorporates a reprogrammable microcontroller and a series of pin female inputs and outputs to connect easily and conveniently there different sensors so you can control lights, motors and other actuators. The Arduino microcontroller is programmed using the Arduino programming language (based on Wiring) and the Arduino development environment (based on Processing). The projects made with Arduino can run without connecting to a computer. It also has its own software that can be downloaded from their official website that already includes drivers of all available cards making easier loading codes from the computer.

The Arduino components are as follows


Bill Of Materials For
Design Title
Author
Document Number
Revision
Design Created
sábado, 04 de octubre de 2014
Design Last Modified
miércoles, 16 de septiembre de 2015
Total Parts In Design
59


0 Modules
Quantity
References
Value
Stock Code
Unit Cost
Sub-totals:
€0,00
12 Capacitors
Quantity
References
Value
Stock Code
Unit Cost
6
C1,­​C3-C4,­​C10-C12
100n
€0,23
1
C2
1uF
€0,09
2
C5-C6
22pf
€0,12
1
C7
1uf
€0,09
2
C8-C9
47u
€0,52
Sub-totals:
€2,84
16 Resistors
Quantity
References
Value
Stock Code
Unit Cost
1
R1
10k
RS461-3745
€0,21
2
R2,­​R10
1M
RS223-2653
€0,05
5
R3,­​R6-R7,­​R13,­​R16
560R
RS223-2221
€0,09
3
R4-R5,­​R8
1K
RS223-2265
€0,03
3
R9,­​R14-R15
10K
RS461-3745
€0,21
2
R11-R12
22R
RS740-9173
€0,10
Sub-totals:
€1,68
5 Integrated Circuits
Quantity
References
Value
Stock Code
Unit Cost
1
U1
ATMEGA328P
RS738-0435
€2,67
1
U2
ATMEGA16U2
RS715-3791
€3,30
1
U3
NCP1117ST50T3G
RS802-2130
€0,01
1
U4
LP2985-33DBVR
RS660-6733
€0,72
1
U5
LMV358MGKR
RS660-6727
€0,04
Sub-totals:
€6,74
1 Transistors
Quantity
References
Value
Stock Code
Unit Cost
1
Q1
FDN340P
RS671-0435
€0,04
Sub-totals:
€0,04
8 Diodes
Quantity
References
Value
Stock Code
Unit Cost
4
D1-D3,­​D7
LED-YELLOW
RS692-1102
€0,58
3
D4-D6
DIODE
RS773-4514
€0,03
1
D8
LED-VERDE
RS692-1102
€0,58
Sub-totals:
€2,99
17 Miscellaneous
Quantity
References
Value
Stock Code
Unit Cost
1
FU1
0.5A
RS647-8156
€0,37
1
J1
CONN-SIL10
RS797-3233
€1,26
1
J2
CONN-H6
RS765-5672
€1,09
2
J3-J4
CONN-H8
RS797-3239
€1,67
2
J5,­​J7
ICSP
RS681-2931
€0,35
1
J6
CONN-DIL4
€0,35
1
J8
CON_USB_B
RS748-0866
€1,21
1
J9
POWER JACK DC
RS 488-376
€0,40
1
JP1
JUMPER
RS745-7065
€0,07
1
L1
1u
RS724-1539
€0,01
1
S1
PULSADOR_DOBLE
RS378-6410
€0,32
2
VR1-VR2
VARISTOR CG0603MLC-05E
RS690-9938
€0,10
1
X1
RESONATOR
RS792-6524
€0,24
1
X2
CRYSTAL 16MHZ
RS226-1831
€1,33
Sub-totals:
€10,89

Totals:
€25,18


Photos arduinoooooo components

Two components stand out in our Arduino

ATMEGA 328P


The 8-bit AVR Atmega328 is an integrated high-performance RISC microcontroller is based circuit, combining 32KB ISP flash memory with the ability to read-while-write, 1KB of EEPROM memory, 2KB of SRAM, 23 lines I / S general purpose registers 32 overall process, three flexible timer / counters with comparison, internal and external interruptions, USART scheduler mode, byte-oriented serial interface 2 wire SPI serial port, 6- channel 10-bit A / D converter (8-chanales in TQFP and QFN / MLF packages), "watchdog timer" programmable internal oscillator and five modes software selectable saving energy. The device operates from 1.8 to 5.5 volts. By executing powerful instructions in a single clock cycle, the device achieves 1 MIPS response, balancing power consumption and processing speed.


ATMEGA 16U2


The high-performance, low-power 8-bit Atmel AVR RISC-based microcontroller combine With 16KB ISP flash memory read-while-write capabilities, 512B EEPROM, 512-Byte SRAM, 22 general purpose I / O lines, 32 general purpose working registers, two Flexible timer / counters With compare modes and PWM, USART, programmable watchdog timer With internal oscillator, SPI serial port, debugWIRE interface for on-chip debugging and programming, and five software selectable power saving modes. The device Operates betweeen 2.7-5.5 volts.
By executing powerful instructions in a single clock cycle, the device achieves throughputs approaching 1 MIPS per MHz, balancing power consumption and processing speed.


Proteus start our project in this scheme based on the Arduino Uno we found in internet


So we have the plate in Proteus


This is a genaral view of the plate in Proteus


This is the part of Atmega 16U2


This is the part of Atmega 328P


This is the part of the Jack


This is the part of connections


This is the part of Reset and ISCP


This is the part of Bypass


This is the part of USB


3D view


3D view


Layout view


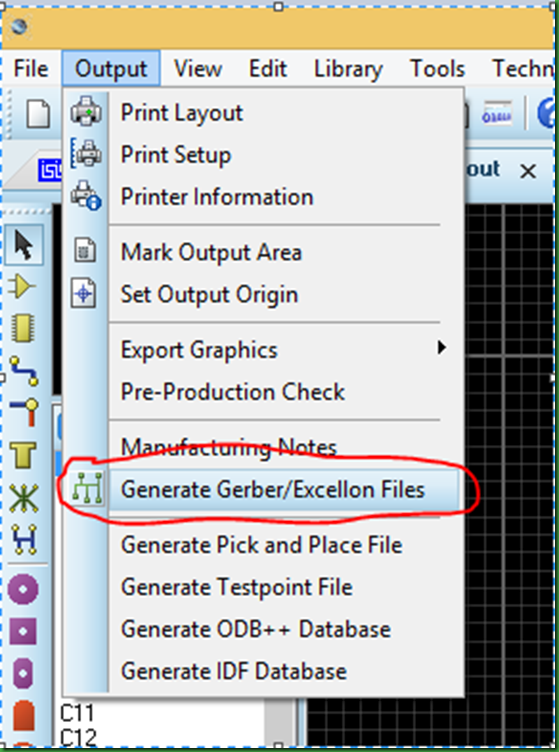
We will export our board design to computer CNC


This is the CNC that we used


Once the plate on the CNC must be put rivets


Plate without rivets


Plate with rivets


Then we solder the components to the board


After soldering all the components on the board this is the end result, the board is ready.


domingo, 13 de septiembre de 2015

Speech Recognition with Labview

Speech Recognition


This practice is to design a program using LabVIEW in which through voice recognition user dictates aloud a certain number of words or phrases and get the program to recognize executes a command depending on the word or phrase has been said . The words recognized by the program and their order are:

Encender, starts the Windows Media Player with a song already selected previously
Apagar, stop the Windows Media Player
Racing, look up the word "Racing" in google
Metallica, look up the word "metallica" in google
Silla, look for the word "silla" in google
Search is directed to the home page of google
Gato, look up the word "gato" in google
Despiporre, look up the word "despiporre" in google
Descalzaperros, look up the word "descalzaperros" in google
Ha sonado chof, find the phrase "ha sonado chof" in google
Un muscalita con hielo, look for the phrase "un muscalita con hielo" in google


To start this practice in Labview start looking for a LabVIEW subVI called Initialize Speech Recognizer Labview designed by people in charge of recognizing the words we utter and detects voice recoimiento.

The words we have chosen to introduce a string.


This string will go connected to Initialize subVI Speech Recognizer.


To configure the search for google homepage will go to the menu, conectivity, Active X, invoke node and remove the box as shown in the images below.


To configure the Windows Media Player with a song will go to the menu, conectivity, active x, property node and remove the box as shown in the images below.


Here is how we stay the block diagram.


Thus While we remain in the block diagram.


This would be the view of the front panel.


Database with Labview

Database with Labview


This practice is to create and read a database Access Database using Labview and then display the data table in a chart, in addition to insert, delete or update data in the database that we created. In practice the graph representing the evolution of the temperature in a given period of time we will choose.


The first thing you have to do to make this practice is to create an Access database.


After creating the database, we have to go Labview and create a UDL file, which files are associated database with data binding.
The following video shows how you performed.


Once you associate the UDL file in the same folder we will place our saw, for the simple fact that if we want to export our lead or saw will always be associated.

We will have to create a SubVI to create the table of the database.


We also need to create a SubVI to read the table of the database.


The SubVI we've created the go getting into each of the events we've created.


Once we are in the program we see as we create the stepper table.
The first is to look for the file location.


Then we put the name to the table and columns.


Press the create button to create the table.


Press the read button to read the table.


Press the display to display the table in the graphic button.


Once the graphics displayed will press the reset button to restart the program.


lunes, 31 de agosto de 2015

Ethernet and LM35 temperature sensor

Ethernet and LM35 temperature sensor


In this exercise we will create a program that measures environmental Arduino using the LM35 temperature sensor. Besides we use our Arduino Uno to create a server on the network and provide the measured value with the sensor. It has also included a warning in case the temperature rises above 24 degrees Celsius.

/*
Autor: Ángel Barquín                         Fecha: 05-02-2015
Programa: ethernet mas temperatura           Versión: 1.0
Dispositivo: ATMEL 328                       Compilador: AVR
Entorno ID: 1.5.5-r2                         Simulador: VSM
Tarjeta de aplicación: Arduino
*/

///////////////////////////////////////////////////////////////////
// The program measures medianto the environmental temperature sensor LM35.
// Here we use our Arduino Uno to create a server on the network,
// And provide the measured value with the sensor. Also included is notice
// If the temperature rises above 24 degrees Celsius.
// Arduino 1 has -Aref = Aref = GND and + 5V.
// So we can not measure negative temperatures.
///////////////////////////////////////////////////////////////////


// Libraries included

#include <SPI.h>
#include <Ethernet.h>
// We define variables temperature
int temp;
int valorLeido;

// Initializes the HTTP server on port 80 and the Mac and manually enter the IP
byte mac[] = { 0xDE, 0xAD, 0xBE, 0xEF, 0xFE, 0xED };
IPAddress ip(172, 100, 4, 177);
EthernetServer server(80);  //creating an object of class ethernetServer.


void setup() 
{
  Serial.begin(9600);
  while (!Serial) 
  {
     // wait for serial port to connect. Needed for Leonardo only
  }
  Ethernet.begin(mac, ip);//ethernet connection initialization
  server.begin();
  Serial.print("the server's ip: ");
  Serial.println(Ethernet.localIP());
  analogReference(INTERNAL);
}


void loop() 
{
   valorLeido=analogRead(4);//Read the value of the analog pin specified. This means to be assigned
    // Input voltages between 0 and 5 volts in integer values between 0 and 1023
    // 100 microseconds (0.0001 s) it takes to read an analog input,
    // so the maximum reading rate is about 10,000 times per second.
   temp= (valorLeido*1.1*100)/1023;
  // listen until a connected client.
  EthernetClient client = server.available();
  if (client) 
  {
    Serial.println("new customer");
    Serial.println();
    // http request must end with a blank line.
    boolean currentLineIsBlank = true;
    while (client.connected()) 
    {
      if (client.available()) 
      {
        char c = client.read();//We read the petition.
        Serial.write(c);//the request is shown by the serial.


        if (c == '\n' && currentLineIsBlank)//we see that what we have received is a request.
        {
          // send a standard http header
          client.println("HTTP/1.1 200 OK");
          client.println("Content-Type: text/html");
          client.println("Connection: close");  //the connection is closed after completion of the answer
          client.println("Refresh: 1");  // the page is refreshed every 1 second.
          client.println();
          client.println("<!DOCTYPE HTML>");
          client.println("<html>");
                  
          client.print("<h2>");
          client.print("<h2 align=center>The measured temperature is displayed with an LM35 sensor<h2>");
          client.print("<h2>");
          client.print("<br />");
          client.println("<center>");
          client.print("<h6>");
          client.print("Ambient temperature:  ");
          client.print("<br />");
          client.println(temp);
          
          client.println("degrees Celsius");
          client.print("<h6>");
          client.println("<center>");
          if(temp>26 && temp<28)// if the temperature is between 26 and 28 degrees can see a                                                  //picture we warn
          {
           client.println("<body bgcolor=yellow>");
           client.print("<img src=https://encrypted-tbn0.gstatic.com/images?q=tbn:ANd9GcScZQcjwfFrrVwDI1V0jcRscC7fZTEqXpNYE93FLXutlfKN5CsE>");
          }
          if(temp<=26 && temp>0)
          {
            client.println("<body bgcolor=blue>");
           client.print("<img src=http://aventalearning.com/content168staging/foreignlanguage/spanish1a/images/niceweather.GIF>");
          }
          if(temp>=28)// if the temperature is under 26 degrees 
                              // show one image that reflects cold
          {
            client.println("<body bgcolor=red>");
            client.println("<center>");
            client.print("<br />");
            client.print("<h2>");
            client.print("The temperature is too high");
            client.print("<h2>");
            client.println("<center>");
            client.print("<img src=https://blogger.googleusercontent.com/img/b/R29vZ2xl/AVvXsEj7pit7HUeYuIdlJMfHAzODDzivw3wV13jNstiNsFkI3xLVnn9gaURkks655PUrOcVvrwYC0TeuVlfWIcRqVs3ggdKL3MXkPywMJBn8AGVyEa4Ow_nxq36n9bx0obdipKW4yNimY1G7nVE/s1600/hot.gif>");
          }
          
          client.println("<br />");
          client.println("</html>");
          break;//once we sent the data back to check clients making requests
        }
        if (c == '\n') 
        {
          // you're starting a new line
          currentLineIsBlank = true;
        }
        else if (c != '\r') 
        {
          // you've gotten a character on the current line
          currentLineIsBlank = false;
        }
      }
    }
    // give the web browser time to receive the data
    delay(1);
    
    client.stop();// close connection
    Serial.println("This is the request received");
    Serial.println("------------------------");
    Serial.println("Customer offline");
    Serial.println("-------------------------------");
  }

}

SPI

Serial Peripheral Interface


The example I show you then use the communication protocol Serial Peripheral Interface (SPI) using the Proteus program for controlling a digital potentiometer


We will choose the microcontroller of Atmel ATMEGA 328P


In this picture we see how we connect the potentiometers


/*

  Digital Pot Control
  
  This example controls an Analog Devices AD5206 digital potentiometer.
  The AD5206 has 6 potentiometer channels. Each channel's pins are labeled
  A - connect this to voltage A - connect this to the stress
  W - this is the pot's wiper, which changes when you set it     W - it is wiper of potentiometer, which changes when configure

 The AD5206 is SPI-compatible,and to command it, you send two bytes, 
 one with the channel number (0 - 5) and one with the resistance value for the
 channel (0 - 255).  

The AD5206 is compatible with SPI, and to command them, you send two bytes,
   one channel number (0 - 5) and one with the resistance value for the
   channel (0-255).

 The circuit:
  * All A pins  of AD5206 connected to +5V      * Todos Unos pasadores de AD5206 conectados a + 5V
  * All B pins of AD5206 connected to ground     * Todos los pines B de AD5206 conectados a tierra
  * An LED and a 220-ohm resisor in series connected from each W pin to ground    * Un LED y un resisor 220 ohmios en serie conectado desde cada pasador W a tierra
  * CS - to digital pin 10  (SS pin)    * CS - al pin digital 10 (pin SS)
  * SDI - to digital pin 11 (MOSI pin)  * SDI - al pin digital 11 (pin MOSI)
  * CLK - to digital pin 13 (SCK pin)   * CLK - al pin digital 13 (pin SCK)
  
  // The Bus SPI (Serial Peripheral Interface) is a communications standard, mainly used for
  transferring information between integrated circuits in electronic equipment. The bus serial peripheral interface
  or SPI bus is a standard for controlling almost any digital electronic device that accepts a serial bit stream
  regulated by a clock (synchronous communication).

It includes a clock line, incoming data, outgoing data and chip select pin, which connects or disconnects the operation
the device with which you want to communicate. Thus, this standard allows multiplexing clock lines.


 created 20 Febrero 2015 
 by Ángel


*/


// include the SPI library:    // SPI library include:
#include <SPI.h>


// set pin 10 as the slave select for the digital pot:
const int slaveSelectPin = 10;

// const is used to declare a constant field or constant local.
// The constant fields and local variables are not and can not be changed.
// Constants can be numbers, Boolean values, strings or a null reference.
// int variable is an integer data type


// (void setup) initializes and sets the initial values

void setup() {
  // set the slaveSelectPin as an output:                           // Set slaveSelectPin as an outlet:
  pinMode (slaveSelectPin, OUTPUT);    // Set the pin as an output ss
  // initialize SPI:                                                // Initialize SPI:
  SPI.begin();    // Initializes the SPI protocol
}

// (void loop)It is doing loops consecutively

void loop() {
  // go through the six channels of the digital pot:      // Go through the six channels of digital potentiometer:
  // (int channel) declares the variable
  // = initializes
  // ++  increase from 0 to 6
 // Initialization happens first and exactly once. Each time through the loop, the condition is tested;
   // if true, the increase and the block of statements is executed, then the condition is tested again.
   // When the condition becomes false, the loop exits.
  
  for (int channel = 0; channel < 6; channel++) { 
    // change the resistance on this channel from min to max:        // Change the channel resistance from minimum to maximum:
     // for = is used to repeat a block of statements enclosed
    
    // increases the level of 0-255
    for (int level = 0; level < 255; level++) {
      digitalPotWrite(channel, level);
     // Write a HIGH or LOW value to a digital pin (potentiometer)
       // If configured as an output pinMode (), the voltage is set to the appropriate value:
      //5V para HIGH, 0V (tierra) para LOW.
      delay(10);
      // Pauses the program for the amount of time (in milliseconds) specified as a parameter.
    }
    // wait a second at the top:       // Wait a second at the top:
    delay(100);
    // change the resistance on this channel from max to min:      //  Change the channel resistance in the MIN MAX:        
    for (int level = 0; level < 255; level++) {
      digitalPotWrite(channel, 255 - level);
      // increases the value down
      delay(10);
    }
  }

}

void digitalPotWrite(int address, int value) {
  // take the SS pin low to select the chip:     // Take the low value of the SS pin to select the chip:
  digitalWrite(slaveSelectPin,LOW);
  //  send in the address and value via SPI:       // Send the address and SPI value through:
  SPI.transfer(address);
  SPI.transfer(value);
  // take the SS pin high to de-select the chip:    // Take the high value of the SS pin to deselect the chip:
  digitalWrite(slaveSelectPin,HIGH); 
}

In these images we see through voltmeters as it changes the resistance value in each of the 6 channels of the potentiometer as time passes